January 30, 2009: Don't Throw That Away!!

Cheryl's Garden Goodies had a great blog on "garbage to garden" this week. It has prompted me to give a few of my hints at salvaging some of the common items I find in my kitchen and/or pantry. They usually consist of those nasty plastics that we would like to keep out of our landfills. That isn't feasible in most cases, so maybe we can at least have them do double duty, therefore extending the time they serve as useful items and possibly keeping us from purchasing even more plastic for our gardening use.

First on the list is my bleach jug that is used to make mini-markers for my seedlings.


Remove the label and rinse it out.


Cut off the top (save it, it can be used as a funnel!). Cut strips about 1/2" wide
all around, cutting through the ridge near the bottom.


Cut around the bottom ridge, releasing the strips from the jug.
Cut one end of each strip into a point. Use a waterproof marker for the labels.

I got 29 markers and a funnel for Mr. H to use for his oil changes on our cars. The bottom of the jug could be used as a saucer under your seedlings (see my last recycling hint).

....................

Next comes the containers in which I buy our bunny greens during the winter, when I can't get them from my garden. These come full of Spring Greens, and I buy them for around $5-6. The containers are quite sturdy, so I use them and reuse them in the kitchen, but they also make great mini-greenhouses for seed starting:


Just empty, rinse it out and soak off the labels.


Turn the top upside down to use as a base. Set your seedlings on it, snap the bottom over the base. If it needs to be vented, just unsnap the top of your greenhouse and prop it up a bit on each side.

....................

Number three is a no brainer. If you (or friends and family) ever go to motels or hotels, be sure to have everyone hoard those disposable shower caps that are found in every bathroom!


They make mini-greenhouses over pots, even those that are 12" or more across. They allow the containers to be set outside in the sun, even on windy days, and provide protection for your seedlings. Of course, you probably want something in your pot, not just a funny frog hanging from the side of an empty one!

....................

My final tip for the day is (so far) untried. I have high hopes that it works well, though.

I recently bought a lot of Campbell's Soup at Hand that happened to be on sale. My granddaughter also consumes these as an after school snack, and her mother finds them handy as a "diet food", so I've asked them to save the containers for me.


First I eat the soup (duh). Then I remove the covering and wash the container.


Next, I cut the container on the line that is near the bottom.


I drill drainage holes in the small section. The lid has ready made drainage holes for the larger section.


The small section holds seed starting mix, the larger section contains potting soil. Once the seedlings are ready to pot, they will be moved from the small section into the larger section to grow until they are ready to go into the garden.

I had thought the larger section might make a good cutworm collar if it were inserted into the ground around the plant, but I see the metal ring might have to be destroyed or the plastic sides cut for easy plant removal. I'll know for sure once I've tried this method.

January 28, 2009: Brrr!!!

I had this ready to publish yesterday, then lost my WIFI connection for the entire day...so here it is, a day late. And yes, the cucumbers survived!
..................................................

So...Arizona wasn't so warm this morning. It was 28F when we got up! I haven't been out to see if the cucumbers survived it, but they are on the sheltered side, right up against the house and surrounded by concrete, so they might be OK. The salad garden is looking just fine.

It has been thirteen days since I transplanted everything from the containers to the Square Foot Garden. Mr. H said nothing would grow, but he was wrong! I have already picked a few leaves of lettuce for the rabbit, but I am disappointed that the spinach isn't showing much growth. The beets are looking great, and the radish seeds have all sprouted and most are showing true leaves.


Salad Garden #1 January 15


Salad Garden #1 January 28


Look closely! Can you see it has grown?

The weather forecast says it's supposed to warm back up into the 70s later this week, with lows in the 40s. I'm ready! I do suspect our weather forecast is coming out of Parker, AZ or Blythe, CA though, as it's never quite as warm here as reported. Sometimes they miss it by as much as ten degrees for our low temperature reading.

............................................

(whimper) I just previewed this post and the WIFI went down again (whimper). At this rate, I might get it published by spring.


January 24, 2009: My First Try at Seed Saving/Starting


I debated on whether or not I should even blog about what I did today, but I decided it wouldn't be right to only blog about my successes and ignore my failures. Not that this is a failure....not yet, anyway. It's more of an experiment that has a good chance of failing.

Last fall I bought the biggest, reddest bell pepper I'd ever seen. I also bought a very large jalapeno pepper. On a whim, I scooped out the seeds, dried them and saved them.

Today I was cleaning the laundry room, and I found half a bag of seed starter mix that was left from last winter. I rounded up some plastic containers, drilled a few drainage holes in the bottoms, filled them with the seed starter mix and set them in a sink of hot water until the mix was well dampened. Using the end of a pencil, I made six depressions in each container of mix and, moistening the lead end of the pencil, I picked up one pepper seed at a time and dropped it into a depression. I then covered the seed with about 1/4" of mix. I set the containers on a large plastic lid to catch the water that drains from the containers, and I set a plastic lid loosely on each one. I put them on top of the refrigerator, where they should stay warm and comfy until (I should say IF) they sprout.

I have no idea if these seeds are viable. It will take 2-3 weeks to find out. If they do grow, I have no idea if they will be like their "parent" peppers, or if they will revert back to some previous strain.


I'm keeping my fingers crossed that I'll have some sturdy pepper plants ready for my Washington garden next April.

January 22, 2009: Tomato Bonanza!

I happened upon a wonderful website a couple of weeks ago. WinterSown Org offers tomato seeds for nothing more than a SASE. They have a list of varieties available, and you can chose six of the ones you want. You must also chose four alternates, just in case some of your first choices are no longer available. I figured it was worth a try. What could I lose besides an envelope and three stamps?

EUREKA! My seeds arrived yesterday!

I had requested the following, and I received all the ones that I have in bold red. In most cases the seed count is approximate, I didn't want to open the packages.

First choice:
Stupice
New Yorker
Amish Paste

Black Cherry - 17 seeds Clusters of plum-brown fruits, 1" across, delicious, IND, 65+ DTM

Cherokee Purple - 25 seeds Deep, dark rose-tone beefsteak, known for great flavor, most fruits over a half pound, IND, about 80 DTM

Brandywine - 12 seeds
Pink fruits can weight up to a pound or more, IND, 85 DTM

Alternates:
Tumbling Tom - 12 seeds Loads of red cherries on dwarf plants are perfect for pots or hanging containers, DET, about 70 DTM

Green Grape - 10 seeds Compact plants crop loads of yellow-green fruits about 3/4" long, great flavor, about 70 DTM

Marglobe - 13 seeds Great flavor from yesteryear, this fine cropper deserves a spot in every garden, red 6 - 7 ounce globes, DET, 75 DTM

Kellogg's Breakfast - 9 seeds Pale-orange beefsteaks can weigh a pound, IND, 80+ DTM


They also enclosed the following, which were not on my list:


Miracle of the Market (tomato)- 25 seeds Siberian origin, red fruits about 2 - 4 ounces, IND, 60 - 70 DTM

Nyagous (tomato) - 25 seeds Clusters of brick-brown fruits, about 6 ounces each, productive, IND, 80 DTM

And even some squash! Too bad I just bought an entire package of these, so if anyone wants them just email me.

Waltham Butternut Squash - 9 seeds


That's nine varieties of tomatoes I'll be attempting to grow this year! Guess what? I am going to have to make a few changes in my garden plans. I think corn is out and (more) tomatoes are in!

I really wanted to try the Tumbling Toms in containers this year. Maybe even a couple of upside-down hanging buckets.

I hope the Green Grape are the same as some my dad grew a few years ago. They were sweet as sugar, and I remember standing by his kitchen sink and consuming an entire day's picking and not even looking at a salt shaker!

I love cherry tomatoes. I usually only plant two of whatever variety happens to be displayed at my local nursery. I'm very anxious to try Black Cherry this year, as I have heard nothing but good things about it.

I'm really excited about Nyagous after reading about it!
"The Nyagous Black Tomato is a very rare black tomato variety from Russia. This variety was originally introduced to the United States from the collection of the famous tomato enthusiast, Reinhard Kraft of Germany. Of late, Nyagous Black has become one of the more highly sought after Russian tomatoes by tomato lovers. Nyagous produces wonderful globe shaped tomatoes in small clusters of 3 to 6 tomatoes each. The tomatoes produced by Nyagous have a very smooth, round shape which makes this an ideal tomato for market growers. Unlike many other black tomatoes, Nyagous Black is much less prone to cracking or cat-facing. The tomatoes are typically a dusky-red color (but lighter and darker variations do exist, ranging from typical red to a near black with an emerald green interior) with meaty flesh and possess a sweet, aromatic taste."

I just hope I'm successful at starting my own plants for the 2009 garden. I normally don't return to my home in Washington in time, but this year I'm pushing Mr. H to return two weeks earlier than usual, which will give me about eight weeks of growing time before the warm weather plants can go outside.

Of course, I still have to devise an indoor seed starting area. I plan on using the "plant window" in my laundry room. It faces north, so it's not the perfect spot, but I think it's wide enough to fit a 4' double shop light under one of the shelves. Or, if I get real ambitious, maybe even under two of the shelves (there is another adjustable shelf that isn't shown in this photo)!


*Friends of WinterSown donate their extra seeds to be shared through their
Seeds for SASE programs. Please help and donate your extra seeds. For information about donating seeds please visit WinterSown Org Seed Donations

January 21, 2009: Have a Berry Good Day!

I know. It's the wrong time of the year to be thinking about making blackberry syrup, but my friends, EG of Our Engineered Garden and Carolyn of Spcastles, already have visions of those succulent berries dancing in their heads and have requested I post the recipe on my blog. Since I tend to have lapses of short term memory, I'd better just get it done now...EG and Carolyn, save this one, it's really good.

This was my Mother-in-law's recipe, way back in the 60s. That was long before HFC was thought to be a bad thing. Now there is some indication high fructose corn syrup isn't so bad after all, so I'm not going to worry my old head over it.

I use wild blackberries for this recipe, but you can use any type of berries. Wash them well, put them in a large saucepan and heat, stirring and mashing, until they are hot and juicy. Press them through a colander, and then strain the juice through a jelly bag or two layers of cheesecloth. Sometimes the natural pectin content of the berries is so great that this turns to jelly rather than syrup. If that happens, we make toast!


Berry Syrup

2-1/2 cups berry juice
3 cups sugar
1/2 cup corn syrup
1 tablespoon lemon juice

Combine all ingredients. Bring to a full rolling boil and boil exactly 1 minute. Remove from heat and pour into sterilized pint jars. Cover with lids and jar rings and process in a boiling water bath for 10 minutes.

January 18, 2009: Happy Blog Birthday to Judy!


Happy First Blog Birthday to

Judy's Square Foot Garden Blog!

I can't tell her in person, as her blog requires one to join to leave a comment. So if anyone "see's" Judy, please tell her I wish her many more years of healthy, happy garden blogging.

January 17, 2009: The Arizona Salad Garden Part 2

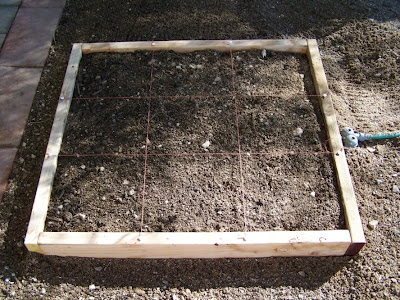
Mr. H fought me all the way on adding another box to the little garden. I don't know why he was so stubborn about it, it's only a tiny 3' square box! I had asked him to help me put it together, as the scrap lumber I'm using is so twisted it takes two to hold it in place and screw it together. He did finally give in, and even insisted I toss one piece of 2x4 in the garbage and cut the section from a new one. I wasn't worried about a slightly skewed garden, the boards are mainly for stapling poultry wire for a rabbit barrier. Sure, I'd like beauty...but I'll settle for utilitarian.

Anyway, Mr. H insists nothing will grow large enough to eat before we head back north. He just doesn't "get" that I've already calculated the days to maturity, and that we'll be eating spinach, lettuce, beets and radishes long before March 15th. He insists everything has been out there in pots for "months" and hasn't grown a bit. I say pooh on Mr. H. He knows nothing about growing a garden!

After I got the frame in place, I transplanted the remaining spinach and lettuce, then decided to attempt transplanting the beets. I think they should do fine, as the soil they were in was so loose there was no damage at all to the tap roots.

This bed didn't get the addition of potting soil and composted manure that the first bed got. It will have to survive in what I could save from the pots in which they grew, mixed with the good old desert sand. I will give them an occasional drink of liquid Miracle Grow.

The rabbits didn't come back last night, but I wrapped the rest of the poultry wire around the new bed just in case. I hope it holds until tomorrow, when I'll add some posts and staple it on. I hate the looks of the wire, but it has to be.


#2 Garden Plan


Everything's planted...the smaller beets are actually the earliest ones planted. The bigger ones were seeded about a month later.


Beds #1 and #2 complete and waiting to have the poultry wire stapled in place. This should give us some nice salads soon.


January 16, 2009: Happy Birthday to Annie & Otter

Annie and Otter celebrated their first birthday today!

It was a lovely, sunny day so we took them up the hill and turned them loose to run in the desert. They spent about an hour running loose and exploring everything in sight, then returned home for a big drink of cold water and a birthday cupcake.


Annie was the first one to try the new food...as usual.


Otter was tentative, but curiosity got the best of him.


Mmmmm...that's some good stuff!


Then they really get down to business.

Happy Birthday Annie & Otter!
We love you.


January 16, 2009: Granny 1, Rabbits 0

I have a feeling it's going to be touch and go with this little garden. I'm surprised the rabbits didn't gain entry with only 2' of chicken wire between them and paradise, but they sure tore up the ground trying.


January 15, 2009: What's a Granny to Do?

What's a Granny to do when....

The sun is shining,
The temperature is 75F,
She has a bunch of 3' lengths of 2x4 lumber,
Half a bag of potting soil,
Half a bag of composted manure, and
She's not really happy with container gardening

Well, she does what any red blooded gardening granny would do. She plans a square foot garden!


And then she builds it!


Then she fills it with the little plants from the container garden!


And she fences it to keep all the little bunnies from eating everything!


Then she checks the temperature and sees that it is perfect for making her new garden grow.


*And begins to plan another little garden to build tomorrow.


*Granny has a lot of room for building gardens, but only about 60 days left in Arizona. That severely limits what can be grown and harvested.


January 10, 2009: The Container Garden

Back in November I started a little container garden. This is what it looked like on November 13th. The clear plastic containers on the plant ladder, and the planter on the far left were greens I potted up and brought down from the garden up north. The other pots contain spinach, lettuce, onions (green ones from the grocery store), beets, parsley and a couple of cucumbers.


This is a garden?

Since then, I've used all the older greens except those on the far left. One looks suspiciously like a cabbage, so I'm going to let it mature. Most of the other seeds germinated and are finally showing some growth, having done almost nothing for over a month. Others, more recently planted, have nearly caught up to the earlier seeded plants.


Rather pitiful when compared to my home garden, isn't it?


It looks as though January 1 might be the optimum date for starting these cool weather crops. Nothing was gained by planting two months earlier. In fact, I had dumped out the contents of a planter of lettuce seedlings last spring when we were ready to head north. Last week I noticed some tiny lettuce plants sprouting in the dirt where I'd emptied the container! They had laid dormant through the hot summer, fall and most of the winter. They must have sprouted around January 1. I moved them into one of the containers, and they're looking quite happy! Maybe when I'm ready to go back home I should sprinkle some of my leftover lettuce seed out in the back and just see if it sprouts and grows in January of 2010.


January 6, 2009: Alicyn Reacts to "Grandma"!

My grandchildren love me. Really, they do.


Just look at how 11-week-old Alicyn reacts when she hears "Grandma"!


Nevermind.


January 5, 2009: Master Garden Plan

I've finished making my garden plans for 2009. Along with the two beds I showed in my post from January 1, I will also be planting the dog kennel area.

I'll tell you all how to get a really big, sturdy trellis. One that is big enough and tall enough for anything you might want to grow.

First you buy two puppies. Then you spend $200 on a 7'x13' chain link kennel to keep said puppies safe. Then you spoil said puppies so they will NOT use said kennel. Move said kennel to corner of vegetable garden, remove 1 1/2 sides for access to existing gardens and use remainder for trellises.


Next to the dog kennel garden is the north garden. As of now, I think I might plant corn in one of the 4'x8' beds. I wasn't going to fool with it, as we do get very good local corn, but I just might talk myself into it. I think it depends on just how many broccoli, cauliflower and cabbage seeds germinate for me. If I have a lot that grow into sturdy plants I may bag the corn idea.


So here is the complete garden (not shown is a small plot for cucumbers along the west fence).


This still gives me room for a few containers, and I might want more pepper plants and maybe some shade loving flowers behind the dog kennel.

January 4, 2009: A Spring Planting Schedule

Since most of my seeds have already been purchased, and I know what plants I will be buying, it's time to figure out a planting schedule that will take full advantage of my growing season. Again, as in my past 32 years of gardening, I depend on my old standby Crockett's Victory Garden. Not only does it have planting schedules for all the zones, I happen to be in the same zone as the Victory Garden so the entire book can be followed, month by month, as written.

Following is my possible planting schedule. It's quite probable not everything on the list will be planted as planned here, either due to lack of need or lack of space, but it does give me an idea of what can be planted if the need arises.

March 15 Cabbage, Golden Acre (start seedlings)
March 15 Cauliflower, Early Snowball (start seedlings)
March 15 Radishes, Gourmet Blend (1st. planting)
March 15 Broccoli, De Cicco (start seedlings)
March 15 Onions, Walla Walla Sweet (plants)
March 15 Onions, Yellow (sets)
March 15 Potatoes (1st. planting)
April 02 Mesclun, Mixed Salad Greens (1st. planting)
April 02 Beet, Detroit Supreme (1st. planting)
April 02 Lettuce, Prizehead (1st. planting)
April 02 Parsnip, Andover (1st. planting)
April 02 Peas, Super Sugar Snap (1st. planting)
April 02 Peas, Tall Telephone (1st. planting)
April 02 Spinach, Tyee Hybrid (1st. planting)
April 02 Radishes, Gourmet Blend (2nd. planting)
April 02 Lettuce, Buttercrunch (1st. planting)
April 15 Parsley, Moss Curled
April 15 Carrot, Chantenay (1st. planting)
April 15 Carrot, Imperator (1st. planting)
April 15 Carrot, Rainbow Blend (1st. planting)
April 15 Peppers, Green Bell (start seedlings)
April 15 Peppers, Jalapeno (start seedlings)
April 15 Broccoli, De Cicco (plant transplants)
April 15 Cabbage, Golden Acre (plant transplants)
April 15 Cauliflower, Early Snowball (plant transplants)
April 15 Spinach, Tyee Hybrid (2nd. planting)
May 03 Godetia, Double Azalea Flowered Mix
May 03 Basil, Italian Large Leaf
May 03 Beans, Contender bush (1st. planting)
May 03 Beans, Kentucky Blue pole (1st. planting)
May 03 Beans, Royal Burgundy bush (1st. planting)
May 03 Cucumber, Spacemaster (1st. planting)
May 03 Nasturtium, Dwarf Jewel Mix
May 03 Nasturtium, Glorious Gleam Mix (trailing)
May 03 Marigolds
May 03 Lettuce, Prizehead (2nd. planting)
May 03 Mesclun, Mixed Salad Greens (2nd. planting)
May 03 Radishes, Gourmet Blend (3rd. planting)
May 03 Sunflowers, Vanilla Ice
May 03 Squash, Burpee's Fordhook Zucchini (1st. planting)
May 03 Squash, Early Golden Summer Crookneck (1st. planting)
May 15 Beans, Royal Burgundy bush (2nd. planting)
May 15 Beet, Detroit Supreme (2nd.. planting)
May 15 Carrots, leftover mix (2nd. planting)
May 15 Peppers, Green Bell (plant transplants)
May 15 Peppers, Jalapeno (plant transplants)
May 15 Sweet Potatoes (1st. planting)
May 15 Tomatoes
June 02 Squash, Watham Butternut (winter)
June 02 Squash, Acorn (winter)
June 02 Beans, Contender bush (3rd. planting)
June 02 Beans, Kentucky Blue pole (2nd. planting)
June 02 Broccoli (direct seed)
June 02 Cabbage (direct seed)
June 02 Carrots, leftover mix (3rd. planting)
June 02 Cauliflower (direct seed)
June 02 Parsnip, Andover (2nd. planting)
June 02 Squash, Burpee's Fordhook Zucchini (2nd. planting)
June 02 Squash, Early Golden Summer Crookneck (2nd. planting)
June 10 Sweet Potatoes (2nd. planting)
June 15 "Beans, Royal Burgundy bush (2nd..planting)
June 15 Beet, Detroit Supreme (3rd. planting)
June 15 Carrots, leftover mix (4th. planting)
June 15 Potatoes (2nd. planting)
July 01 Beans, Kentucky Blue pole (3rd. planting)
July 01 Beans, Contender bush (3rd. planting)
July 01 Cucumber, Spacemaster (2nd. planting)
July 01 Squash, Burpee's Fordhook Zucchini (3rd. planting
July 01 Squash, Early Golden Summer Crookneck (3rd. planting)
July 16 Beet, Detroit Supreme (4th. planting)
July 16 Carrots, leftover mix (5th. planting)
July 16 Lettuce, Prizehead (3rd. planting)
July 16 Mesclun, Mixed Salad Greens (3rd. planting)
August 02 Peas, Super Sugar Snap (2nd. planting)
August 02 Peas, Tall Telephone (2nd. planting)
August 02 Radishes, Gourmet Blend (4th. planting)
August 02 Spinach, Tyee Hybrid (3rd. planting)
August 16 Lettuce, Buttercrunch (2nd. planting)
August 16 Lettuce, Prizehead (4th. planting)
August 16 Mesclun, Mixed Salad Greens (4th. planting)
September 03 Lettuce, Prizehead (5th. planting)
September 03 Radishes, Gourmet Blend (5th. planting)
September 03 Spinach, Tyee Hybrid (4th. planting)

The odd planting dates (normally I'd plant on the 1st. or 15th. of each month) are from using a fun (and free) little program I found on the Ed Hume Seeds website. It's called Moonbook, and it is a calendar of best dates to plant according to the moon. Now....I'm not saying there is anything to that, but my grandmother always planted according to the phases of the moon and she had lovely gardens. On the other hand, I never have paid any attention to the moon, and I have lovely gardens too. But I figured I'd give it a try, why not?

All tomatoes and my main crop of peppers will have to be purchased from a nursery, as I don't return to my home in Washington early enough to start them myself. This will also be the year to purchase strawberry and raspberry plants. I'm hoping my daughter kept my sweet potato plant alive through the winter so I can cut slips from it in the spring.

January 1, 2009: A Garden Journal for 2009 and Beyond

I've been drooling over gardening journals today. I keep pretty good records on my computer, but sometimes I'd like to write things down where I can sit back and read and compare what I've done through the years. Most journals just cover one year. Some are so extensive they have room for ten years of records. I thought 3-4 years to a page would be perfect for keeping track of my successes and failures, so I designed a simple page (actually a series of pages) that would cover my gardening season from March 1 through October 30, with four years of records to a page. I'll print out these pages and keep them in a three ring binder at my desk.

***Click the photos to enlarge***


I also have pages for seed/plant inventories. Go ahead and drool over my seed expenses for the year.....you know you want to. I'd like to have $41.94 worth of seeds for $5.16 every year!


My third page is similar to the above, only it's for miscellaneous garden expenses (compost, tools, wood for garden beds, etc).

I'll also include plans, on graph paper, for each year's garden. Here is what I've decided to put in my east (#1 fence line) garden this spring (one square = 1 foot, MG = marigolds):


And here are the plans for my east (#2) gardens. The brown strips are where I'll lay the soaker hoses:


Not shown are the sugar snap peas that will cover 12' of the south fence, and cucumbers that will be planted along the fence on the west side of the yard.

I still have the north gardens, and the dog pen/arbor gardens to finish planning. I think I'm going to have to convince Mr. H to move that new fence about 8 feet closer to the house so I can make room for three more 4'x 8' (or longer) beds!

Happy New Year....let's make 2009 the "Year of the Garden"!